Integration Process
1. Get the App Key
10. Pass additional data to SDK
Sign-in to AdGyde Dashboard, the credentials would have already been provided by AdGyde support team. In case you have not yet received the same, please contact the AdGyde Support Team.
Please follow the given steps :-
Step 1 - Visit the AdGyde Website - https://www.adgyde.com/
Step 2 - Go to Login
Step 3 - Sign-in with the provided credentials
Step 4 - Go to Setup Page
Step 5 - Select Manage Applications from the Application option on Setup Page
Step 6 - Click on "Create an application" option on Top Right corner
Step 7 - Fill in the Application details
Step 8 - Note down the App Key for integration reference
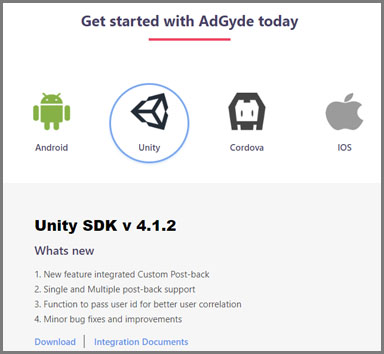
2. Download Unity SDKPlease follow the given steps :-
Step 1 - Visit the AdGyde Website - https://www.adgyde.com/
Step 2 - Go to Login
Step 3 - Sign-in with the provided credentials
Step 4 - Go to Setup Page
Step 5 - Select Manage Applications from the Application option on Setup Page
Step 6 - Click on "Create an application" option on Top Right corner
Step 7 - Fill in the Application details
Step 8 - Note down the App Key for integration reference
Select Download link from the SDK KIT option on Setup Page.
Link will redirect you to AdGyde SDK Page. From here download the Desired SDK
Integrate the downloaded SDK using the below steps
3. Integrate SDK into projectLink will redirect you to AdGyde SDK Page. From here download the Desired SDK
Integrate the downloaded SDK using the below steps
3.1 Add library files into the project
3.2 Follow below steps to import .aar file into the projects
3.3 Initializing AdGyde
3.6 Add permissions to project
3.7 Add dependency to project
4. Sessions- Unzip AdGyde Android Unity SDK
- Add ADGYDE_ANDROID_Unity_SDK file to the Unity project
- Open Unity Project and switch platform to Android
- Click Assets -> Import Package -> Custom Package (AdGyde Unity Package)
- Select All files in import window and click import
- Create an empty game object in Hierarchy tab
- Add the AdgydeDemo.cs file to the empty game object
3.3 Initializing AdGyde
Android Unity SDK needs to be initialized in the main Script. Please check Example project on Android Unity SDK for complete code.
3.4 Pass IMEI to AdGyde (Works for Android 9 and below)| using System.Collections; using System.Collections.Generic; using UnityEngine; using UnityEngine.UI; public class Sample_UI_Class : MonoBehaviour { private static Sample_UI_Class _instance = null;} public Text DebugLog; void Awake(){ AdgydeManager.SharedInstance.Adgyde_Init();} |
If the application needs to pass the IMEI and record the same along with other user details, then Android SDK needs to be given permission to pick up IMEI explicitly. Even when application has the permission, AdGyde SDK doesn't pick up IMEI without App developer consent which user needs to pass to the SDK using AdgydeManager.SharedInstance.OnImeiPermission(true) function
Along with above permission make sure application itself has the permission to pick up IMEI. Add Phone state permission in the applications manifest.xml file
Below is the sample code to initialize Android SDK with App Developer consent to pass IMEI
3.5 Embed Google Play Services into the App Along with above permission make sure application itself has the permission to pick up IMEI. Add Phone state permission in the applications manifest.xml file
| <uses-permission android:name="android.permission.READ_PHONE_STATE" /> |
Below is the sample code to initialize Android SDK with App Developer consent to pass IMEI
void Awake() { } |
Install the Google Play Services SDK and import it into the project. For download details, Click here.
Add the below code / entry to the AndroidManifest.xml as the last entry in the application tag (Just before </application>)
NOTE:
AdGyde recommends to always use the latest version of Google play service.
For more details see the link below.
https://developer.android.com/google/play-services/setup.html
Add the below code / entry to the AndroidManifest.xml as the last entry in the application tag (Just before </application>)
| <meta-data android:name="com.google.android.gms.version" android:value="@integer/google_play_services_version"/> |
NOTE:
AdGyde recommends to always use the latest version of Google play service.
For more details see the link below.
https://developer.android.com/google/play-services/setup.html
Please refer below code
< application android:icon="@drawable/app_icon"</application> |
3.6 Add permissions to project
Add following permissions to AndroidManifest.xml
| <uses-permission android:name="android.permission.INTERNET"> </uses-permission> |
3.7 Add dependency to project
To allow th application to get the attribution details, the below code is mandatory.
Add the following dependency to Android gradle file (Module : android).
Add the following dependency to Android gradle file (Module : android).
dependencies {} |
A session is a conversation between mobile application and user. A session starts with application start and it ends after the user has quit the application. AdGyde helps to track the sessions of the application, session duration and time spent by user on application.
Sessions Detailed Integration Process
5. User FlowSessions Detailed Integration Process
'User Flow' allows the Application Developer to gauge the movement of its users through the activities defined in the application. By analyzing the user flow Sankey diagram, the App developer can predict which activity is most popular among its users and where the drop-off rates are high.
User Flow Detailed Integration Process
6. Uninstall TrackingUser Flow Detailed Integration Process
AdGyde's Uninstall Tracking functionality allows you to track the number of uninstalls for a specified application. Uninstalls is an important index which helps you to track the quality of users and hence the campaign.
Un-Install Detailed Integration Process
7. EventsUn-Install Detailed Integration Process
AdGyde's Event Tracking allows an application owner to track the events triggered by users. What user is doing in the application are generally tracked using the events like - Registration, Add to Cart, Payment initiated, Payment.
AdGyde supports multiple types of events, please follow the below link to integrate events in the application
Events detailed integration process
8. Deep LinkingAdGyde supports multiple types of events, please follow the below link to integrate events in the application
Events detailed integration process
Deep linking is the act of launching a mobile app while serving personalized content or sending the users to specific activities within the application.
Deep Linking Detailed Integration Process
9. DemographyDeep Linking Detailed Integration Process
AdGyde demography data provides details of Age and Gender wise segregation of User, this can be used by Advertiser to target the new users and run their campaigns effectively.
Demography detailed integration process
Demography detailed integration process
10. Pass additional data to SDK
AdGyde allows to pass addition data like Userid to SDK so that same can be correlated to the AdGyde Data and logs.
- Advertiser's User id
In case Advertiser needs to relate Application analytics data with its own User Id then advertiser can pass the same to AdGyde SDK explicitly using AdgydeManager.SharedInstance.SetUserId("ADG1045984") function. Analytical data then can be shared with the install, events etc. Userid wise also.